AppWriter Mac installation
AppWriter Macs installation file is downloaded from our account site, https://aw.wizkids.dk
You have to log in – There is different login methods like UNI-Login, Google Login, Feide or Office 365.

When you’ve logged in you can in you can in the top right corner see ‘’Your account and products”. Press your name that’s marked in blue to reach the account page.

AppWriter Mac are available for download as long as you have a active license. Press the AppWriter Mac icon and start the installation.
When the installation is done, the file should open. The downloaded .dmg-file will contain the installation file.
Drag AppWriter to applications. When that’s done, press ‘’Program’’ in Finder.
Press AppWriter and open the file. To open the program the first time you have to accept that you want to start AppWriter. Press ‘’open’’.
- When you’ve opened AppWriter, enter your computers system settings.
- Inside the system settings, go to “Security and privacy”.
- Press “Privacy”.
- Select “Accessibility”.
- Press the lock at the bottom so you can change the settings.
- AppWriter will be included in this list. Select AppWriter to give permissions correctly. If AppWriter is not in the list, tap the + icon at the bottom and add AppWriter from Applications.
You are now done with the installation and can go back to AppWriter and log in.
Language packages
AppWriter Mac now works 100% online from the beginning and there is no need to downloading languages anymore. However it may be adavantageous to have downloaded langues in case of lack of internet access.
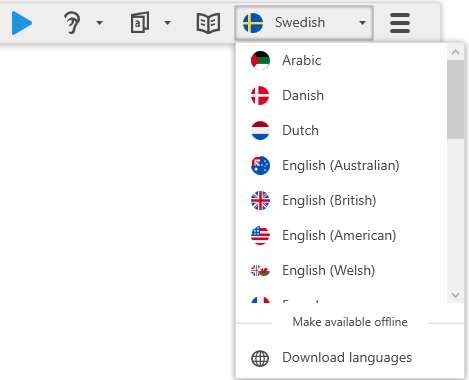
In the AppWriter toolbar, press the flag of the already chosen language.

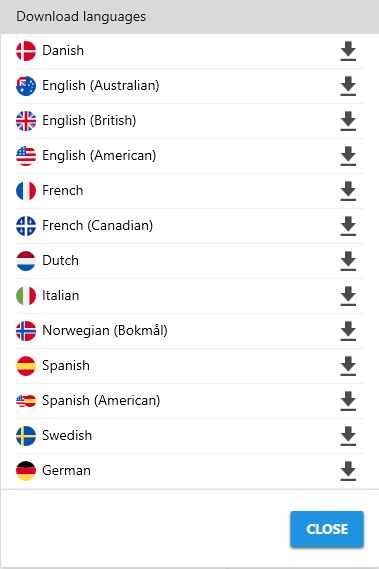
Go down to “download languages and download the languages you want. After downloading the languages, AppWriter Mac can now work offline with the selected languages.
