Administration and login
A major part of TxtAnalyser’s features are in the admin module. In the admin module you can:
- monitor your own log
- create and administrate groups and/or individual students
- download reports for groups and students
- upload documents and have them automatically analysed for grammatical and spelling mistakes
1) How to access the admin module
You can access the admin module in the following two ways.
1. Click on My account from the app menu
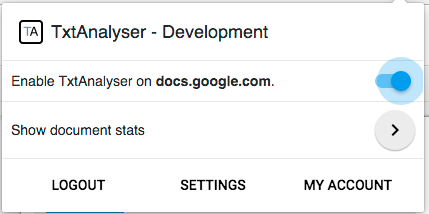
2. Go to account.wizkids.dk and log in with your user login.

2. See your own log
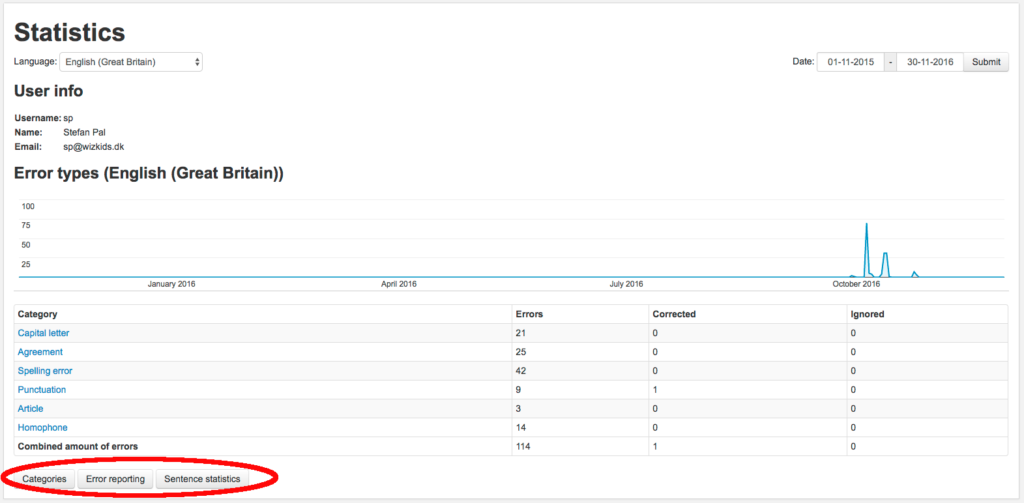
From your account page you can select your own Statistics under TxtAnalyser.
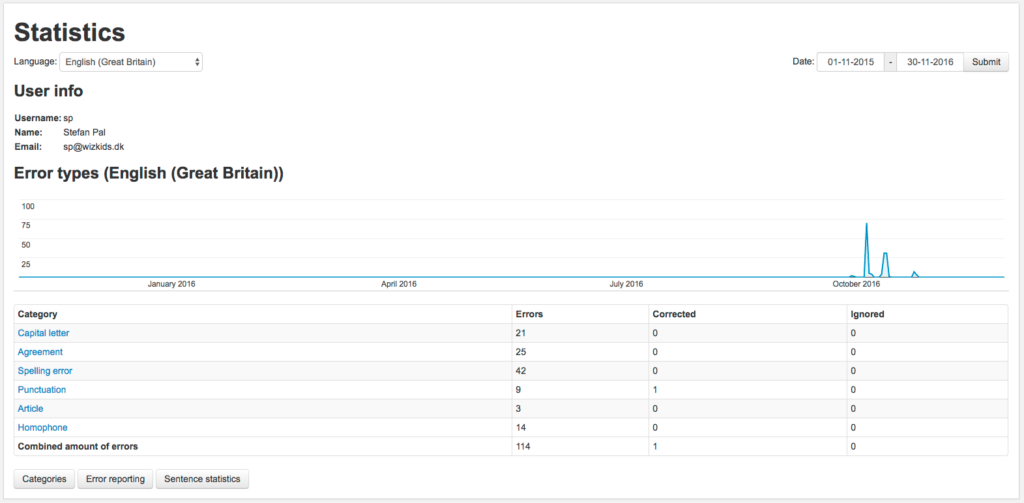
Here you can see a log on your own writing process within a given time period. The table provides an overview on the error categories along with the number of errors within each category. Furthermore, it shows how many of the errors you corrected and how many you ignored.
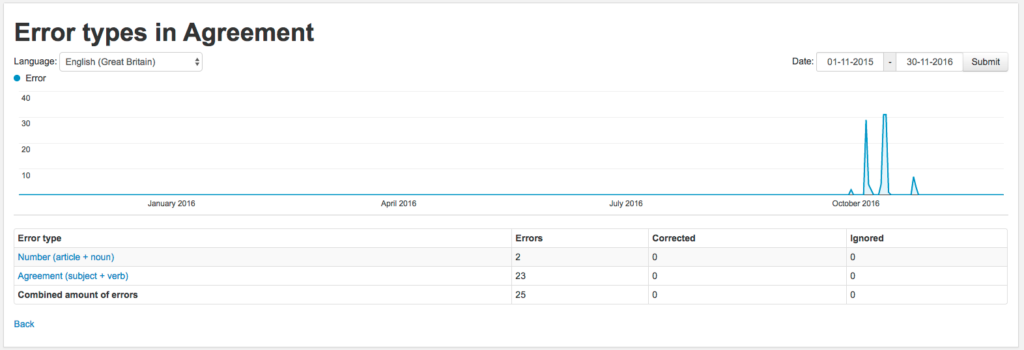
It is possible to click on a category and see the actual errors divided into subcategories.
As previously mentioned, you can also customise the error reporting and the grammatical categories from your statistics page. The two features are accessed from the bottom on that page.
3. Manage groups
As a teacher you can create groups for an entire class or for a number of students. You create a group by going to Groups in the left sidebar menu and click on New group.

Next you name your group and create it.

You can now distribute the group link to your students. When they click the link, they automatically join your group.
You also have the following options:
- Reset group key
- Here you can reset the group key
- Edit Group
- Rename or remove your group
- Stats
- See a detailed overview of all students in your group.
4. Manage categories and error reporting for a group
As a teacher you can control the active grammatical categories for your group as well as the level of feedback the app should provide to your students.
4.1. Manage categories
If you only focus on subject/verb agreement, you can choose Stats and then Categories.
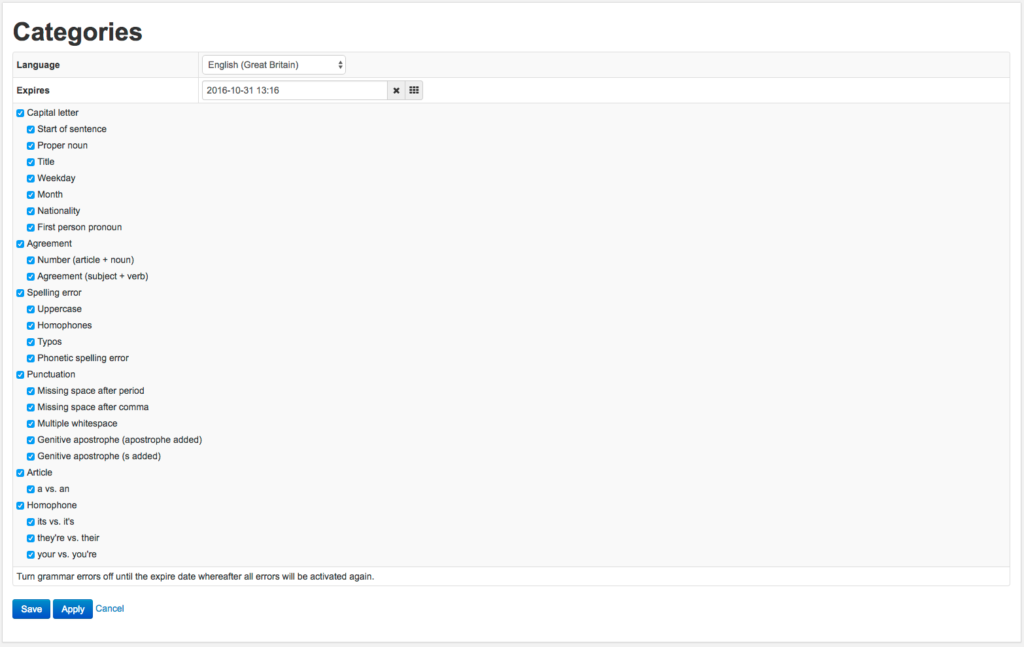
Here you can choose the categories on behalf of your group. If you only select Subject/verb agreement and you set an expiration date, it means that the app will only check for subject/verb agreement until the expiration date has passed. All grammatical categories will automatically be enabled after the expiration date has passed.
Your changes will take effect the next time your students log in to TxtAnalyser. They will not be able to overwrite the settings you have made on behalf of the group.
4.2) Manage error reporting
You can control the program behaviour in terms of the feedback that should be given to your students. Start by choosing Stats and then Error reporting. This will give you the following options
Show all errors with their recommended error corrections
Default setting – the app shows all errors, explanations and corrections
Only show errors without any recommended error corrections
the app shows all errors but without corrections
Only show errors without any information
the app highlights all errors, but it does not give any explanations nor corrections
None
If you want the app to locate errors in a sentence but without giving away the explanation and a correction, you should choose Only show errors without any information.

5. Upload and automatic analysis of students’ work
If you have a number of student assignments that you would like to correct for spelling and grammatical mistakes, you can use the upload-feature.
You first choose the relevant grammatical categories, then you select one or more student assignments.

TxtAnalyser will now automatically analyse the assignments and provide a detailed report across all the documents as well as a report per document.
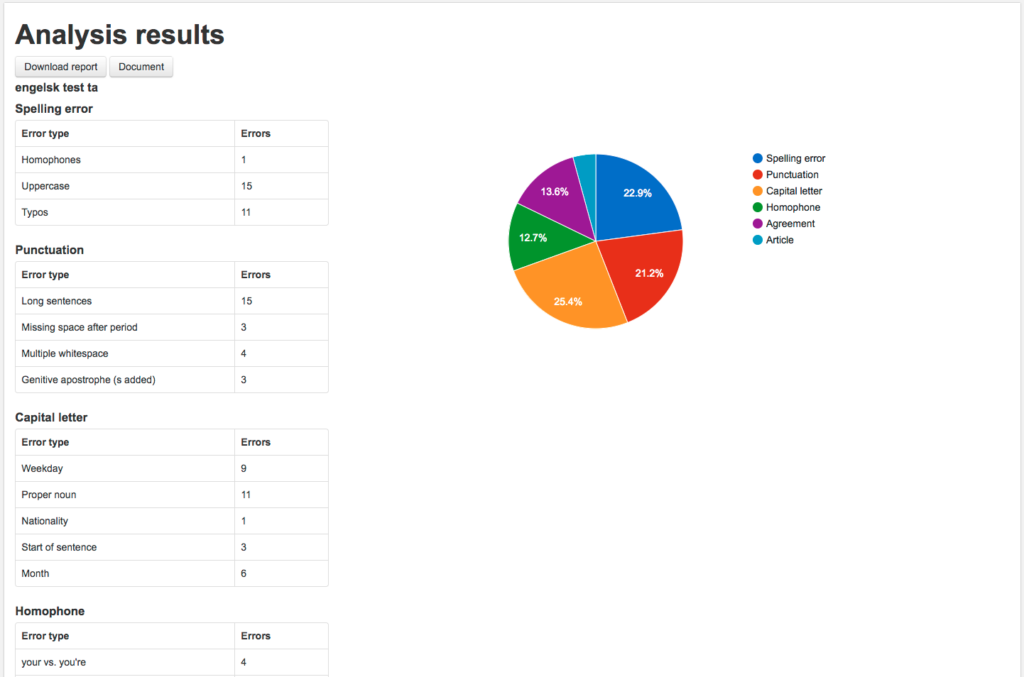
When you click on “Download report”, you can download a spreadsheet. The spreadsheet contains the same data as you see in the overview, but it also contains the specific errors and the context in which the errors occurred in every document. The spreadsheet gives you a more detailed overview.
If you analysed multiple documents at the same time, the documents and its errors will be split into multiple tabs in your spreadsheet.
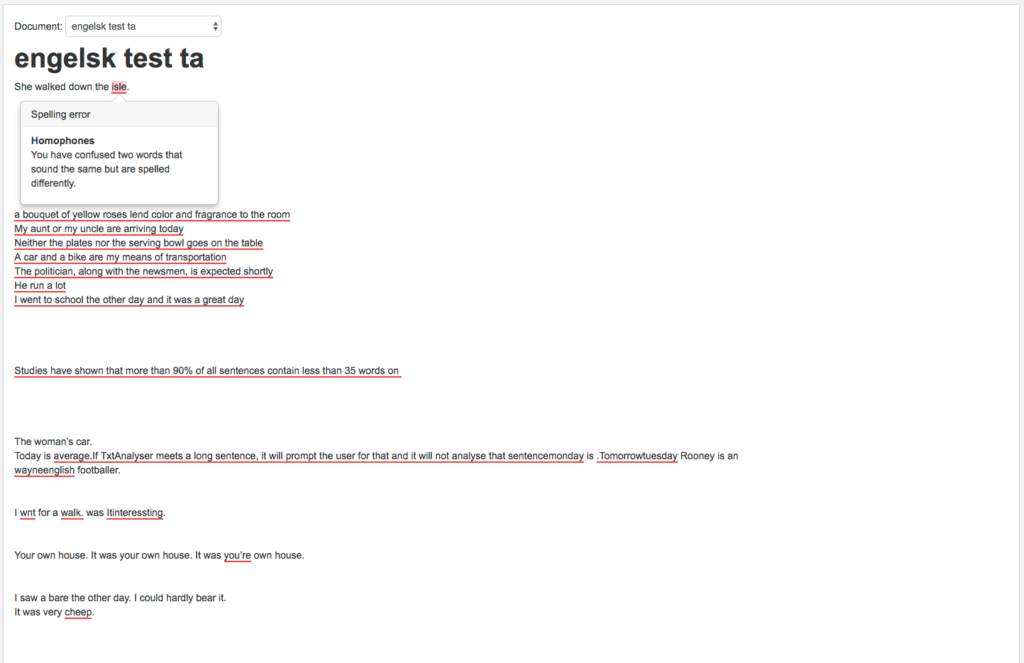
For a quick overview on the actual errors in a document, you can click on “Document”. When you hover over the red lines, you can see the actual error from TxtAnalyser. This enables you to e.g. check if it’s the same word or phrase that is causing problems for all your students, and at the same time it enables you to check if TxtAnalyser correctly identified and categorised the errors.
